
- Homepage
- Disc Diameter
- Features
- 100% Accuracy Of Fit (16)
- 60-day Return Policy (2)
- Adjustable (2)
- Adjustable Seat (2)
- Airbag (2)
- Auxiliary Input (4)
- Cold-air (5)
- Complete Kit (11)
- Composite Design (2)
- Dot-certified (2)
- Durable (2)
- Easy Installation (6)
- Easy To Replace (3)
- Greasable (22)
- New / Aftermarket (23)
- Retractable (3)
- Sealed (10)
- Short Ram (2)
- Other (2216)
- Finish
- 409 Stainless Steel (3)
- Aluminized (15)
- Black (5)
- Brand New (2)
- Chrome (5)
- Chrome / Textured (4)
- Coated (18)
- Matte (8)
- New (2)
- Painted (6)
- Polished (11)
- Powder Coated (3)
- Primed (6)
- Protective Coating (3)
- Ready To Paint (6)
- Satin Aluminum (2)
- Stainless Steel (3)
- Textured (4)
- Textured / Chrome (2)
- Textured / Primed (2)
- Other (2225)
- Fitment Type
- Material
- Abs (8)
- Abs Plastic (6)
- Alloy Steel (25)
- Aluminized Steel (10)
- Aluminum (41)
- Aluminum / Steel (4)
- Aluminum Alloy (7)
- Ceramic (5)
- Graphite Head Gasket (23)
- High-quality Abs (8)
- Metal (6)
- Organic (5)
- Plastic (19)
- Polypropylene (pp) (9)
- Polyurethane (59)
- Rubber (5)
- Silicone (13)
- Stainless Steel (18)
- Steel (80)
- Steel / Plastic (19)
- Other (1965)
- Plate Diameter
Fits 2011 2012 Chevrolet Cruze Front Complete Struts & Rear Shocks Mount Kit × 4
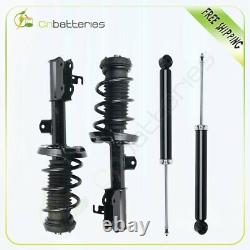
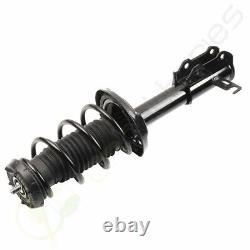
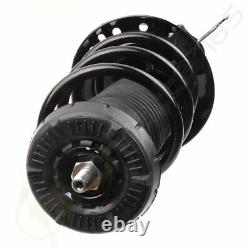
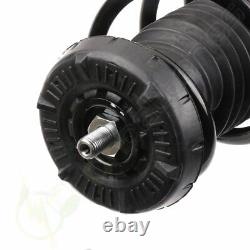
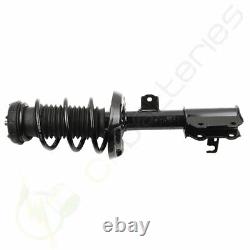
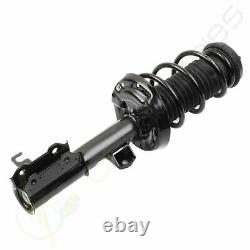
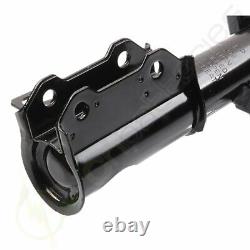
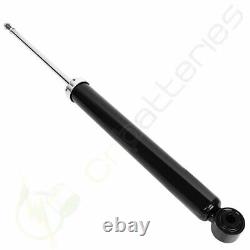
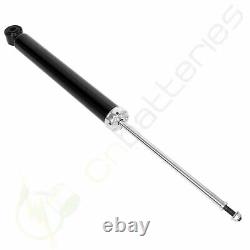
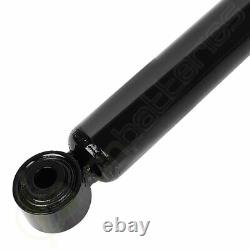
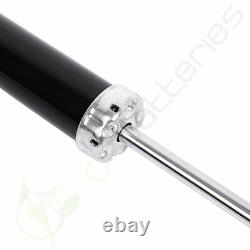


Fits Vehicles of the Following Years and Make. 2012 Chevrolet Cruze (Built Before VIN C7239135) without Sport Suspension Front Rear Driver & Passenger Side Strut & Spring Assembly Set. 2011 Chevrolet Cruze Front Rear Driver & Passenger Side Strut & Spring Assembly Set. Guaranteed Exact Fit for easy installation. 100% BRAND NEW and tested to meet or exceed OEM specifications.
Premium ISO/TS 16949 quality - guaranteed highest quality available. Fits 2011 2012 Chevrolet Cruze Front Complete Struts & Rear Shocks Mount Kit × 4. 2012 Chevrolet Cruze (Built Before VIN C7239135) without Sport Suspension Front Rear. Driver & Passenger Side Strut & Spring. 2011 Chevrolet Cruze Front Rear. Driver & Passenger Side Strut & Spring Assembly Set.These are brand new, not used or junkyard parts. Each complete assembly is built to meet or exceed exact OEM specifications. High corrosion resistance and long service life. Steel rod is mirco-polished with double chrome plate. Newer Valving technology operates in stages based on the velocity of the car.
Use Teflon bonded piston seal to keep friction down and temperature cooler so that valving stays firmer. All-around welding on the spring seat. Includes all of the following (where applicable): strut/shock, coil spring, strut/shock mount, boot, bumper kit, spring seat and isolator. These are guaranteed exact fit and don't require the use of a dangerous spring compressor to swap springs, so they are very easy to install! The struts/shocks are nitrogen gas charged and tuned for each specific vehicle application. Step 1: Before you lift the vehicle, loosen lug nuts one full turn. Step 2: Jack up vehicle and use jack stands for safety & remove the tire from the rotor.Step 3: Wheel alignment is necessary after strut replacement. Marking the position of all the bolts will help keep the alignment close to original and save time aligning.
Use a colored pencil to mark the old strut on the bolt. Step 4: Use penetrating oil (such as WD40) to coat any rusted fasteners, let soak for approximately 1 hour. Step 5: (Optional) While waiting for oil to soak, take this time to inspect all other components that may need replacement (brake pads, rotors, brake hoses, ball joints, CV boots, tie rod ends, bushings, sway bars, etc). Step 6: Remove any brake line or wire attachments from the strut body. Do not disconnect brake lines (if possible)!Opening brake lines will require bleeding of the brake system. Use extreme caution when removing brake lines from your struts, as any damage to your brake line can result in expensive and time consuming repairs.
Step 7: Remove sway bar attached to the strut assembly or control arm. Step 8: Remove the tie rod (only if it attached to the body of the strut, if not leave it attached to the steering knuckle). Step 9: Remove the strut to knuckle bolts at the bottom of the strut. On some vehicles, the brake caliper and rotor may need to be removed to gain access.
Step 10: Remove the upper mounting plate bolts located in the engine or trunk compartment. Do not remove the center retaining nut!
It is not safe to unload the spring from the assembly in this position. Step 11: Carefully remove the old strut assembly from the vehicle.Be very cautious not to let the strut "drop" down on your brake line, rotor or drum. Step 12: Install the new Complete Strut Assembly in the reverse order as above (steps 11-6). Using an anti-seize compound on all fasteners is suggested. Step 13: Carefully double check your work and make sure everything is tightened to manufacturers torque specifications.
Step 14: Replace the tire the rotor and tighten to manufacturers torque specifications. Step 15: Slowly lower the vehicle down after removing the jack stands.
Pay very close attention to any odd sounds when the vehicle is lowered onto the new Complete Strut Assemblies. Step 16: It is very important that you immediately "road test" your vehicle right away to ensure that installation was done properly. Listen and feel for common signs of incorrect installation while driving slowly over speed bumps, rough road or potholes. When the original car shock absorber is removed, the corresponding positions of the top rubber and spring should be marked first. When replacing the shock absorber, ensure that the top rubber and the original mark points of the spring are aligned. Failure to follow this operation may cause.Abnormal noise in the suspension system. Installing the top rubber should use special tools to manually install, remember not to use any tool to clamp the shock absorber piston rod (bright rod part), so as not to scratch the shock absorber piston rod. Do not use pneumatic or electric wrenches for the top glue installation to avoid.
Slippage or damage to the shock absorber piston rod bolts. Check the model compatibility list provided. Complete Struts With Springs Mounts.
Free Return on damaged or defective items. International Buyers C Please Note. These charges are the buyers responsibility. Q: How do I return an item? Please contact our customer service before you return an item.
We will work hard to make sure EVERY CUSTOMER 100% SATISFIED and resolve any problem for you and always leave a feedback to all our customers. If you are satisfied with the product you received, wish you can leave us a feedback. For 03-07 Chevy GMC Pair Set Tow Mirrors Power Heated Chrome Signal Side Mirror. 600-915 Transfer Case Motor For Jeep Commander 2006-10 Jeep Grand Cherokee 05-10.
UTV & ATV Brake System Parts. Nerf Bars & Running Boards. C Notch & Flip Kit. Splash Guards & Mud Flaps.
4 pcs wheel hub bearing. Car Window Film Tint Tools. 12V Universal Fuel Pump Gas Diesel Inline Low Pressure HEP-02A BHEP-02A. 2pc 3157 4114 4157 LED DRL Driving Daytime Running Light Bulbs 12SMD 6000K White. Turbo Turbocharger For Chevy Cruze Sonic Trax & Buick Encore 1.4T 55565353 140HP. Fuel Pump for Chevy S10 GMC Sonoma Hombre 4.3L 97-02 for Isuzu Hombre 4.3L 97-20.
